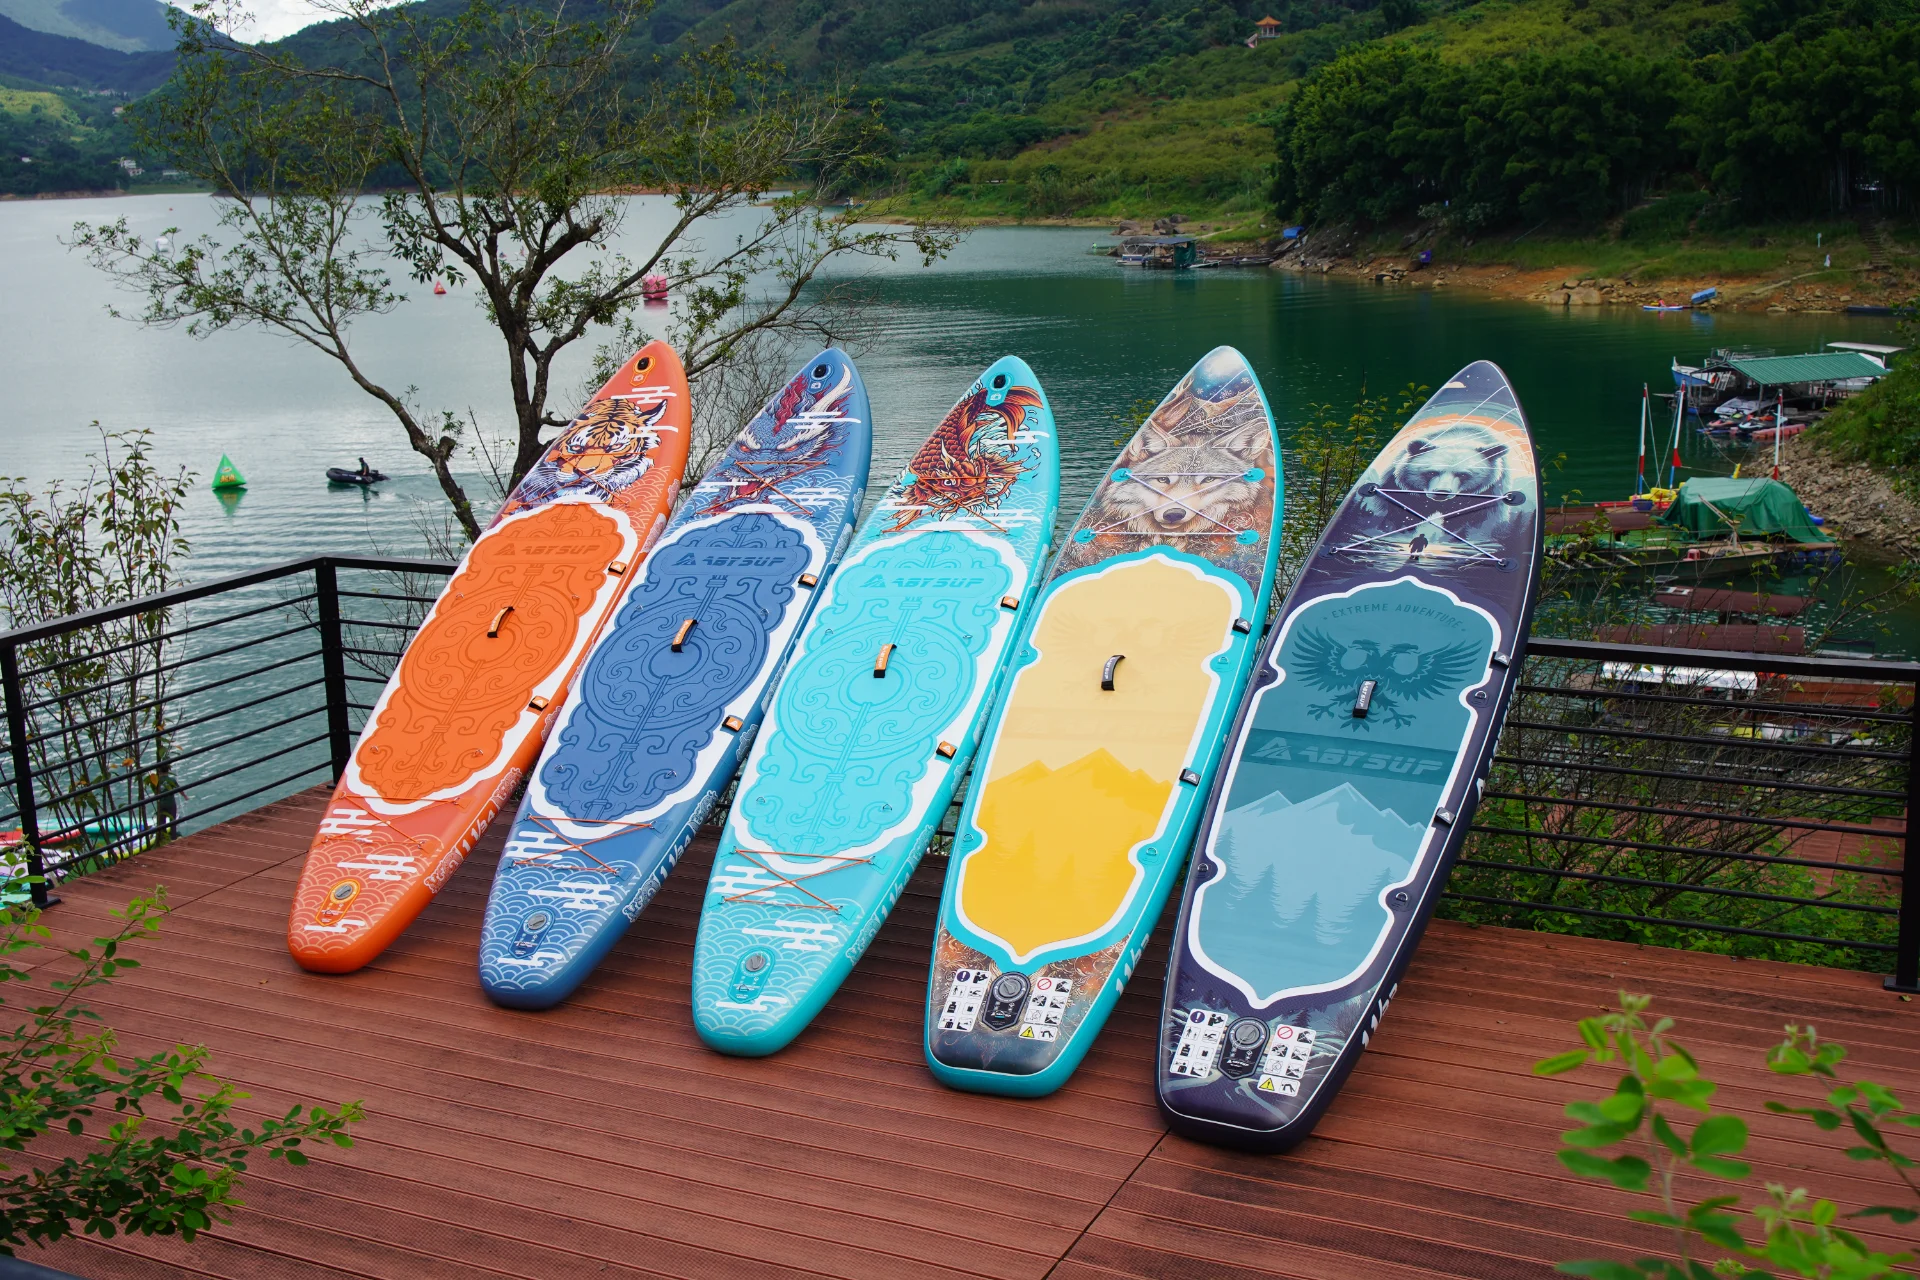

Your inflatable paddle board just came home from a weekend at the lake — still slightly damp, sand stuck to the deck pad, and you’re trying to decide whether to rinse it now or just let it dry overnight. Maybe it’s been three years and you’ve spotted your first soft patch near the nose. Or maybe a friend’s board “deflated for no reason” last summer and now you’re paranoid about yours.
I’m Allen, and I’ve spent nearly a decade at ABYSUP designing inflatable SUPs — testing prototypes until they fail, then dissecting exactly what failed and why. This guide is the honest version of how to keep your board alive for 8+ years instead of 2, told from inside the factory rather than the marketing brochure.
Some of what follows will feel obvious. Some of it will quietly contradict what your retailer told you. All of it comes from boards we’ve cut open after they came back from the field.
Why Maintenance Decides Whether Your Board Lasts 2 Years or 8+
Here’s the spread we see when boards come back to us for inspection:
- Well-cared-for boards: 6–9 seasons of regular use, deck pad still bonded, drop-stitch core firm, valve seal intact.
- Average-care boards: 3–4 seasons, with deck pad lifting at the edges and the first slow leaks appearing around the valve threads.
- Neglected boards: 18–24 months, often with UV-stiffened side rails, delaminated deck pad, or seam separation near the bow.
That’s the same board, the same materials, the same factory. The only variable is how the owner treated it.
The reason this gap is so dramatic comes down to chemistry. Inflatable SUPs are built around a PVC drop-stitch core sandwiched between coated fabric layers. PVC is genuinely tough, but it has three enemies: prolonged UV exposure, sustained heat above ~50°C / 122°F, and sharp pressure spikes. Most owners aren’t damaging their board on the water. They’re damaging it on the way home and in the garage.
“We had a customer ship us a 4-year-old board last spring that looked like it had been used twice. Turns out he’d been doing one thing religiously: rinsing with fresh water and rolling it down to 1 psi for storage. The deck pad was still factory-bonded. That’s when our design team started writing this guide for new buyers.” — Allen Xiao, ABYSUP Design Team
The After-Paddle Routine: 10 Minutes That Matter Most
If you do nothing else from this guide, do this. The 10 minutes between getting off the water and putting the board away is where most damage gets locked in.
Step 1: Freshwater rinse (yes, even on a freshwater lake)
Rinse the entire board with fresh, clean water — top, bottom, rails, and especially around the valve and fin box. Saltwater is obvious. But freshwater lakes carry their own problem: silt, algae, and sometimes invasive species that can dry into the deck pad’s texture and act like sandpaper next time you sit on it.
Time cost: 3–4 minutes with a garden hose. Skip this step in saltwater and you’ll see white salt crystallization around the valve threads within 6 weeks.
Step 2: Towel-dry the deck pad and valve area
The drop-stitch core itself doesn’t mind being damp, but two areas absolutely do: the deck pad bond line (water wicks under the EVA edges) and the valve recess (trapped moisture corrodes the brass valve insert over time).
Step 3: Don’t pack a wet board into a sealed bag
This is the single most common mistake we see. A damp board zipped into a backpack-style bag in a hot car trunk creates a perfect mildew incubator. Within two weeks you’ll have black spotting under the deck pad that no cleaner fully removes.
If you can’t fully dry the board on-site, leave the bag unzipped during transport home and finish drying in the garage.
Step 4: Inspect quickly — every single time
Run your hand along the rails. Check the fin box for stress cracks. Press gently on the deck pad edges. Most leaks announce themselves weeks before they actually fail — a tiny soft spot, a slightly loose D-ring stitch. Catch them early and a $10 patch saves a $400 board.
Deep Cleaning: Beyond the Quick Rinse
Every 8–10 paddles — or roughly once a month in season — your board needs more than a hose-down. Here’s what we recommend, broken down by surface.
Cleaning the EVA deck pad
Deck pads are EVA foam with a textured surface that traps sunscreen residue, body oils, and fine grit. Plain water won’t lift any of those. Use a soft-bristled brush, lukewarm water, and a few drops of pH-neutral soap (dish soap works; avoid anything labeled “degreaser” or containing bleach).
Scrub in small circles, rinse fully, and air-dry away from direct sun. Pay attention to the edges — that’s where the bond line lives, and that’s where neglected dirt eventually leads to lifting.
Caring for the PVC hull
The exterior PVC layer cleans easily. The mistake people make is using harsh solvents — acetone, alcohol-based cleaners, citrus degreasers — which strip the protective topcoat that gives PVC its UV resistance. Once that topcoat is gone, the underlying material yellows and stiffens within a single season.
Stick with mild soap and water. For stubborn stains (tree sap, sunscreen drip lines), a marine-grade vinyl cleaner is fine. Always test on a small area near the tail first.
Hardware: D-rings, valves, fin box
- D-rings: Check stitching and patch glue every deep clean. A loose D-ring patch is a 30-second fix today and a 3-hour repair if you let it tear.
- Valve: Unscrew the valve cap and rinse the valve seat. A grain of sand in the valve seal is responsible for about 40% of the “my board lost air overnight” service calls our team handles.
- Fin box: Slide the fin out fully, rinse the slot, check for hairline cracks at the corners. Fin box stress is invisible until it isn’t.
Here’s a cleaning agent guide based on what’s actually safe on board materials:
| Cleaner | Safe on PVC? | Safe on EVA Deck Pad? | Notes |
|---|---|---|---|
| Mild dish soap + water | Yes | Yes | First choice for almost everything. |
| Marine vinyl cleaner | Yes | Caution — test first | Good for sap, oil stains. |
| Bleach / chlorine | No | No | Strips topcoat, embrittles foam. |
| Acetone / alcohol | No | No | Only for spot prep before patching. |
| Pressure washer | No | No | Lifts deck pad edges. Don’t. |
Storage Mistakes That Quietly Kill Boards
If on-water damage is what owners worry about, storage damage is what actually kills most boards. Here’s what 9 years of warranty inspections have taught our design team.
Short-term storage (between paddle days)
If you’ll use the board again within a week, you have two acceptable options:
- Inflated, indoors, out of direct sunlight — drop pressure to roughly 8–10 psi from full inflation (12–15 psi). This relieves seam stress while keeping the board ready to use. Never store fully inflated in a hot garage; afternoon temperatures can push internal pressure 20–30% higher than what you pumped in.
- Loosely rolled, dry, in a vented bag — fine for cooler garages, less ideal in humid climates.
Long-term storage (off-season, 30+ days)
This is where you protect your investment. Three rules:
- Roll, don’t fold. Folding creates permanent crease lines in the PVC that become weak points. Always roll from the tail toward the valve, leaving the valve open so trapped air escapes.
- Store at low pressure, not zero. Roll the board down to roughly 1 psi — enough that the layers aren’t crushed against each other, low enough that there’s no sustained seam stress. Many owners deflate completely, which actually accelerates micro-creasing.
- Climate matters more than you think. Aim for 10–25°C / 50–77°F and away from direct sunlight. Attics (too hot), uninsulated sheds (freeze-thaw cycles), and car trunks (both, plus UV through windows) are the three places most “warranty surprises” come from.
“One of our designers ran a side-by-side test: two identical boards stored for 12 months — one in a temperature-controlled closet, one in a sunlit corner of his garage. The garage board lost 14% of its tear strength in lab testing. Same factory, same year, same material.” — Allen Xiao, ABYSUP Design Team
If you’re investing in a quality storage setup, a padded carry bag from your manufacturer is usually overkill — but worth it for boards that travel. ABYSUP SUP backpacks and travel bags are designed around the rolled diameter of our own boards, but the principle applies to any iSUP: ventilation, padding at the rolled edges, and no vinyl-on-vinyl pressure points.
“`htmlDIY Repairs You Can Actually Handle at Home
Most iSUP repairs are well within reach of a careful weekend mechanic — if you have the right kit and a little patience. Here’s the realistic scope.
Finding a small leak
Inflate the board to full pressure and listen. If you can’t hear it, mix dish soap and water in a spray bottle, mist the suspect areas, and watch for tiny bubble streams. Common locations, in order of frequency:
- Around the valve threads (often just a loose valve, not a leak)
- Seam edges along the rails
- D-ring patches and handle bases
- The bottom skin (usually impact damage)
Mark the leak with a non-permanent marker and deflate the board fully before doing anything else.
Patching a pinhole or small puncture (under 5mm)
Almost every quality iSUP ships with a basic repair kit, and our design team tests three things on every patch: surface prep, glue spread, and cure time.
- Prep: Clean the area with isopropyl alcohol on a cloth. Let it flash off completely (about 60 seconds).
- Patch size: Cut a circular PVC patch at least 3cm larger in diameter than the damage on every side. Round corners, never square — square corners peel.
- Glue: Apply a thin, even coat of PVC adhesive (HH-66 or equivalent) to both the patch and the board. Wait 5 minutes until tacky.
- Press: Apply the patch, roll it firmly with a hard cylinder (a glue stick works), and weight it down for at least 24 hours before re-inflating.
Don’t shortcut the cure time. We’ve seen properly applied patches hold for years and rushed patches fail in three weeks. Same materials, same technique — the only difference was 22 hours of patience.
Valve issues
A board that loses pressure overnight but has no audible leak is almost always a valve problem, not a hull leak. Most iSUPs use a Halkey-Roberts style valve. Common fixes:
- Sand or debris in the seal: Hold the valve pin open, blast with fresh water, dry. Solves about 70% of cases.
- Loose valve body: The valve threads into a base ring inside the board. A purpose-built valve wrench (~$8) snugs it back down.
- Damaged O-ring: Replaceable, but order from your manufacturer to ensure it’s the right durometer.
D-ring and handle repairs
If a D-ring patch is lifting at one edge but the rest is solid, you can re-glue it the same way as a puncture patch. If it has fully detached, it’s a 20-minute job: clean off all old adhesive with acetone, prep the surface, and glue down a fresh D-ring patch from your manufacturer’s parts catalog.
For more involved fixes — large punctures, seam separation, fin box damage — see the next section.
For our customers, we put together a complete iSUP repair kit with the right glue, primer, patch material, and a valve wrench, so you’re not piecing parts together from three different stores at 9pm before a trip.
“`When to Stop Repairing and Replace the Board
This is the section most blogs skip because it’s the hardest to write honestly. Some damage isn’t worth fixing. Premium buyers respect this conversation more than any sales pitch we could write.
Repairable, almost always
- Pinholes and punctures under 5mm in the hull
- Lifted or partially detached D-ring patches
- Loose valve bodies, dirty valve seals, replaceable O-rings
- Edge lifting on the EVA deck pad (under 5cm of lift)
- Surface scuffs and cosmetic scratches
Repairable, but worth thinking about
- Punctures larger than 5cm — a patch will hold, but it becomes a stress concentration point. Fine on a recreational board, not ideal on a touring board you push hard.
- Seam separation under 10cm — repairable with patient seam-glue work, but if the underlying seam tape has degraded, the next failure won’t be far behind.
- Fin box hairline cracks — fixable by a pro, not a DIY job, and pricing usually runs 30–40% of a new board.
Replace the board
- Major seam separation along the rails (15cm+) — the structural geometry is compromised; you’re paying for a temporary fix.
- Drop-stitch core damage (visible bulging, “pillowing”) — there’s no way to repair the internal threads.
- Multiple deck pad zones lifted across more than 30% of the surface — the bond chemistry has aged out across the whole pad.
- Heavy yellowing, stiffening, or chalking of the PVC — material-level UV breakdown. Patching one spot won’t save a sun-aged board.
Honest trade-off: a well-maintained quality iSUP is genuinely repairable for most of its life. But any board can reach a point where you’re paying $150 in repairs on a board that’s worth $200 used. If the cost of professional repair exceeds 40% of a comparable replacement, the math usually favors a new board — and it’s the rare moment when our design team will tell a customer to stop spending money on the one they have.
A Designer’s Take: What “Built to Last” Actually Means
Maintenance only carries you so far. The other half of an 8-year board is what came out of the factory in the first place — and this is where I’ll be direct about how design choices interact with care.
Single-layer vs. fusion construction
Cheaper inflatable boards use a single layer of coated PVC bonded to the drop-stitch core. They’re lighter and cheaper. They also stretch more under pressure, which means seam stress is higher and lifespan is shorter — even with perfect care.
Double-layer fusion construction bonds the outer PVC to the drop-stitch under heat and pressure rather than wet glue, which produces a stiffer board with significantly less seam stress over time. The trade-off: roughly 1.5–2.5 lbs of added weight per board, and a higher manufacturing cost. For our boards, that’s the deliberate choice we made — and it’s the single biggest factor in why our 6-year-old returns still feel firm.
Drop-stitch density
The internal threads connecting the top and bottom skins determine how rigid the board feels at a given pressure. Higher thread count = stiffer board at lower pressure = less seam stress for the same on-water performance. Our design team specifies 1,000+ threads per square inch on premium models. This is invisible from the outside, which is why marketing rarely talks about it. Your seams will, eventually.
Why we use a recessed valve well
Early in my time at ABYSUP, our team kept seeing returned boards with valve damage from being dragged across rough surfaces. We redesigned the valve well to sit roughly 3mm below the surrounding deck, with a shaped EVA collar around it. It’s a tiny detail that solved roughly 60% of the valve-damage warranty calls in the next 18 months. Industry publications have started highlighting recessed valves as a quality indicator since.
So when you read “built to last,” ask: fusion or single-layer? Drop-stitch density? Recessed valve? Reinforced rails? Those answers — combined with the maintenance habits in this guide — are the difference between a 2-year board and a board you’ll still be paddling in 2034.
If you want to see how those design decisions translate into specific models, our All-Round inflatable paddle board series is the easiest place to see the construction details laid out side by side.
“`htmlFrequently Asked Questions
How long do inflatable paddle boards last?
A well-maintained quality iSUP — fusion construction, double-layer PVC, decent drop-stitch density — should give you 6 to 9 years of regular recreational use. Cheaper single-layer boards typically run 2 to 4 years before they start showing serious fatigue.
The biggest variable isn’t the brand. It’s whether the board lives in direct sun, gets stored damp, and spends summers fully inflated in a hot garage. Three habits — fresh-water rinse, climate-controlled storage, low-pressure roll — push that lifespan toward the upper end of the range almost every time.
Can you leave an inflatable paddle board inflated all summer?
Short answer: yes, but with conditions. If the board is indoors, out of direct sunlight, and in a temperature range under about 25°C / 77°F, leaving it inflated at 8–10 psi (not full pressure) is fine and saves you the hassle of pumping it up before each session.
What you don’t want to do is leave it fully inflated in a hot garage or on a sunlit patio. Internal pressure climbs sharply with temperature — a board pumped to 15 psi at 20°C can hit 18+ psi by mid-afternoon — and that sustained seam stress is one of the most common causes of premature failure we see at the inspection bench.
How do you fix a leak in an inflatable paddle board?
For pinholes and small punctures under 5mm, the process is straightforward: locate the leak with soapy water, clean the area with isopropyl alcohol, cut a round PVC patch at least 3cm larger than the damage in every direction, apply PVC adhesive to both surfaces, wait 5 minutes until tacky, press firmly, and let it cure for a full 24 hours before re-inflating.
The mistakes that cause patch failures are almost always rushing the cure time, using square-cornered patches (peel from the corners), or skipping the alcohol prep step. For larger punctures, seam separation, or fin box damage, it’s worth getting a professional opinion before deciding whether to repair or replace.
Do inflatable paddle boards get damaged in cold weather?
Brief cold exposure during a paddle session is fine. Quality PVC stays flexible well below freezing. The damage comes from storage — specifically, repeated freeze-thaw cycles in an uninsulated shed or unheated garage in colder climates.
The PVC itself handles cold reasonably well, but the deck pad adhesives and seam tapes age faster under thermal cycling. If you live in a region where winter temperatures regularly drop below freezing, store the board indoors at moderate room temperature, rolled at low pressure. It’s the single biggest off-season favor you can do for it.
Is it OK to use an inflatable SUP in saltwater?
Absolutely — saltwater is fine for paddling. The issue is what happens after. Salt crystallizes around the valve threads, the fin box, the D-rings, and the deck pad seams as the board dries. Over time, that crystallization works abrasively against bonds and seals.
The fix is simple and non-negotiable for ocean paddlers: a thorough fresh-water rinse after every saltwater session, paying extra attention to the valve area and fin box. Do that and your board will be just as happy in the ocean as on a freshwater lake — confirmed by every coastal customer we’ve followed up with over a 5+ year ownership window.
Built to Last — Or Get Yours Back to Its Best
If you’re protecting an iSUP you already own, the routines in this guide will buy you years of paddle days you wouldn’t otherwise get. If you’re shopping for your next board and want one engineered to reward proper care — fusion-bonded construction, high-density drop-stitch, recessed valves, reinforced rails — explore our All-Round inflatable paddle board range and find the model built around how you actually paddle.
For dealers, distributors, and rental fleet operators: our design team puts together customer-education toolkits, repair-kit bundles, and trade pricing for partners who want to offer their customers the same factory-level support our retail buyers receive. Request a custom dealer quote and maintenance toolkit and we’ll respond within 24 hours.
Either way, treat the board well, and it’ll outlast most of the gear you bought it with.
— Allen Xiao, ABYSUP Design Team
“`