
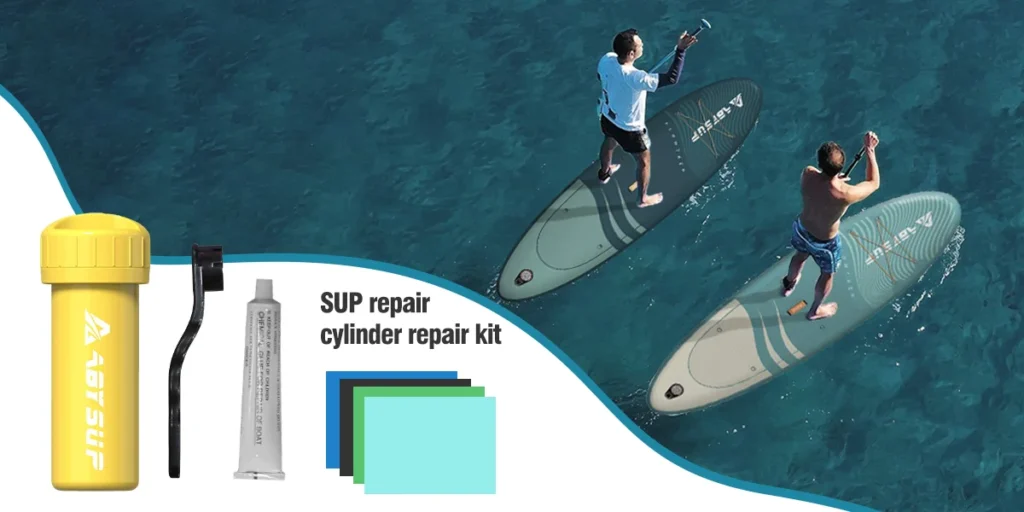
You’ve unboxed the board, inflated it once on the driveway, and now you’re going through the carry bag pockets to see what came with it. Tucked into a side pocket: a small zippered pouch with a few PVC patches, a tube of something, a foil wipe, and a plastic tool you don’t recognize. Your first thought might be — “Wait, is this thing going to break?”
Short answer: almost certainly not. I’m Allen, Senior Industrial Designer at ABYSUP — I’ve spent nearly a decade designing inflatable boards that get dragged across gravel boat ramps, bounced off dock pilings, and strapped to roof racks in 40°C summer heat. The military-grade PVC and drop-stitch core we build with is engineered to absorb that kind of real-world abuse. In our warranty data, puncture-related claims account for less than 2% of all service requests, and almost every one involves an unusual sharp-object incident — a fishing hook, broken bottle glass, an exposed nail on an old dock.
So the repair kit isn’t there because the board is fragile. It’s there because we’d rather give you a 15-minute field fix than make you ship the board back for a problem you can solve on shore with a coffee. Think of it like the spare tyre in your car — you hope you never use it, but you’re glad it’s in the boot.
Why Your Board Almost Certainly Won’t Need This Kit
Before walking through the kit, the more useful starting point is what your board can actually withstand — because it changes how you think about every item in the pouch.
Our boards are built with what’s called drop-stitch construction — thousands of polyester threads connecting the top and bottom PVC layers, with a military-grade reinforced PVC outer skin over them. The skin itself is typically 0.9 mm thick on the rails and underside, with double-layer reinforcement at high-stress zones like the fin box and handle anchors.
To put that in real terms — during durability testing in our design lab last year, we ran a board through 50 consecutive impacts against a pine dock edge at moderate paddle speed. Zero punctures. We dropped a 5 kg sandbag from 1.5 meters onto a fully inflated deck. The board flexed and rebounded; no damage. We dragged a board across a gravel boat ramp 100 times. Surface scuffing but no compromised seams.
“The most common ‘damage’ message we receive isn’t damage at all — it’s a customer worried about a cosmetic scuff on the rail after their first season. I have to gently explain that scuffing the outer printed layer is normal and means absolutely nothing for the board’s structural integrity. The PVC underneath is doing its job. Aesthetic wear is just evidence the board is being used.” — Allen Xiao, ABYSUP Design Team
Here’s the realistic threat list — what your board actually needs to survive in normal use:
- Dragging it across rocks or concrete to launch — survives, may scuff cosmetically
- Bumping into other boards or dock edges — survives easily
- Being stored deflated in a hot garage — survives, no PVC degradation under 60°C
- Salt water exposure — survives indefinitely with a fresh-water rinse after sessions
And here’s what does pose a genuine puncture risk — the small list of things the repair kit is actually for:
- Sharp metal objects — fishing hooks, exposed dock nails, sharp-edged metal hardware
- Broken glass — particularly on urban beaches or near unmarked launch zones
- Pet claws on the deck if a dog jumps onto the board with worn or untrimmed nails
- Sharp branches or thorns when paddling through overgrown river edges
If you’re not regularly paddling near any of those, you’ll probably finish a five-year ownership with the repair kit unopened. That’s the goal.
The PVC Patches: What Makes Them Different from a Bicycle Tube Patch
The patches in your kit aren’t generic. They’re cut from the exact same PVC stock as your board’s hull — same material composition, same thickness, same color where possible. This matters more than it sounds.
When you patch an inflatable structure, you’re not just covering a hole — you’re creating a new bonded section that has to flex, expand, and contract with the rest of the hull through every inflation cycle. If the patch material is stiffer than the surrounding PVC, the board will flex around it and put stress on the patch edge. Within a few inflation cycles you’ll see the edge starting to lift. A patch from non-matching material isn’t a repair. It’s a delayed failure.
Our kit ships with two or three pre-cut circular patches in the 5–7 cm diameter range. The circular shape is intentional — circles distribute stress evenly across all directions, while squares or rectangles concentrate stress at the corners and tend to peel from those points first. For any hole under 5 mm, a 6 cm circular patch with at least 25 mm of contact area on every side is the right size.
Here’s the size logic:
| Damage Type | Patch Size Needed | Field-Repairable? |
|---|---|---|
| Pinhole (under 1 mm) | 5 cm circle | Yes — included kit |
| Small puncture (1–5 mm) | 6–7 cm circle | Yes — included kit |
| Cut or tear (5–20 mm) | 8–10 cm circle | Maybe — larger patch needed |
| Large tear (over 20 mm) | Custom shape, professional | No — contact warranty support |
One honest trade-off: the included patches are sized for what we expect — small punctures from sharp objects. If you slice your hull on a submerged metal edge and end up with a 3 cm cut, the included patches won’t cover it adequately. Reach out to our service team for a larger replacement patch — they’re inexpensive and shipped quickly.
The Glue: Contact Cement and Why It’s Not the Same as Super Glue
The small tube in your kit is not a general-purpose adhesive. It’s a specialized PVC contact cement formulated to chemically bond with the polymer chains in the patch and the hull material. Understanding how it works is the difference between a repair that lasts five years and one that fails after one inflation cycle.
Standard adhesives — super glue, epoxy, household cements — work by sitting between two surfaces and forming a hard layer that holds them together. That’s mechanical adhesion. Contact cement works differently: when applied to both surfaces and allowed to flash off (dry to the touch but stay tacky), the solvent in the cement softens the very top layer of the PVC on both sides. When the two tacky surfaces are pressed together, the polymer chains physically intermingle and re-cure as a single material. The bond isn’t a layer between two pieces — it’s one continuous piece of PVC.
This is why the application instructions matter so much:
- Apply a thin even coat to both surfaces — not just one. Single-side application gives you mechanical adhesion at best.
- Wait 5–10 minutes for the cement to flash off — it should be tacky but not wet to the touch. Pressing too early traps solvent and weakens the bond.
- Press firmly for 60 seconds, then leave for at least 24 hours before re-inflating. Full cure to maximum strength takes 48–72 hours.
The 24-hour cure time is the part most first-time repairers ignore — and it’s the most common cause of patch failure we see. Re-inflating after two hours puts the bond under tension before the polymer chains have fully reformed. The patch will hold, briefly, then start lifting at the edge within a few sessions.
For more on the chemistry behind this kind of adhesion, the contact adhesive entry covers the underlying solvent-based bonding mechanism — the same family of adhesives used in industrial inflatable manufacturing, life raft repair, and commercial whitewater raft maintenance.
One safety note worth flagging: contact cement contains volatile solvents. Always apply outdoors or in a well-ventilated space. Don’t repair in a sealed garage or a small bathroom. The fumes are irritating and the solvent is flammable until fully cured.
The Surface Prep Wipe: The Step Almost Everyone Skips
The foil-sealed wipe in your kit looks like a hand sanitizer wipe. It isn’t. It’s an isopropyl-alcohol-based degreaser specifically chosen for compatibility with PVC bonding. And it’s the single item most likely to be skipped — which is why it’s also the single most common cause of patch failure.
Here’s what it does. PVC accumulates a microscopic film of contaminants over time — sunscreen, body oils from your hands, salt residue, micro-particles of dust, even the natural plasticizer that migrates to the surface of vinyl. None of this is visible. Your board looks completely clean. But that invisible film sits between the cement and the PVC and prevents the solvent from reaching the polymer chains. The bond fails at the surface, not in the cement.
The wipe removes that film. Used correctly:
- Wipe the damaged area in a circle 10 cm wider than your patch — you want a clean halo around the repair zone, not just the patch footprint
- Wipe the back of the patch as well — it has the same surface contamination as the hull from manufacturing handling and storage
- Allow both surfaces to fully dry before applying cement — typically 60–90 seconds in moving air
- Don’t touch the cleaned surfaces with your fingers — your skin oils will recontaminate them in seconds
Skip this step and your repair has roughly half the bond strength it should have. Done correctly, the patch becomes effectively permanent — we have customer boards in the field with patches from five years ago still holding pressure normally.
For background on why solvent-cleaning is standard practice in industrial PVC bonding, polyvinyl chloride chemistry explains the role of plasticizers and surface contaminants — the same principles apply at small scale to your repair kit.
The Valve Tool: The Item Almost Nobody Notices Until They Need It
The plastic or metal tool in your kit is a valve wrench — sometimes called a valve key. It looks like a small two-pronged disc, and it has exactly one job: tightening or replacing the valve core inside your board’s inflation port.
Inside the threaded valve housing on your deck, there’s a removable cylindrical core that contains the spring-loaded pin you press to inflate or deflate. Over years of use — usually after 100+ inflation cycles — the core can occasionally loosen, develop a slow leak, or need replacement. The valve tool is what lets you do this in 30 seconds without specialist help.
To use it: fully deflate the board, unscrew the outer valve cap, insert the prongs of the tool into the matching slots on the valve core, and rotate counter-clockwise to remove or clockwise to tighten. The replacement valve cores are inexpensive and available from our service team or any quality SUP retailer.
I’ll be honest — most paddlers will never use this tool. The valve cores in our boards are torqued to spec at the factory and tested under pressure before shipping. I’ve seen our internal warranty data, and valve core replacement averages roughly 0.3% of all service requests across the lifetime of a board. But when you do need it, you really need it — a slow valve leak that you can’t fix means a board you can’t pump to full pressure. The tool is small, weighs almost nothing, and lives in the front pocket of the bag forever.
“During a multi-day touring test in Croatia in 2022, one of our team members noticed his board was reading 13 PSI in the morning despite having been inflated to 15 the night before. Walked him through the valve tool process by phone — 60 seconds to tighten the core, problem solved, paddled the rest of the day at full pressure. Without the tool he would have been borrowing a board for two days. That’s the entire reason it’s in the kit.” — Allen Xiao, ABYSUP Design Team
The Realistic Field Repair Walkthrough
If you do find a small puncture, here’s the entire process from start to finish. It takes about 20 minutes of active work plus 24 hours of cure time.
Step 1 — Find the leak
Inflate the board fully. Mix water and dish soap in a spray bottle and spray the suspected area. Bubbles will form at the leak site within seconds. Mark the spot with a permanent marker — small dot, not a circle around it (the marker itself can interfere with bonding).
Step 2 — Deflate completely and lay flat
Open the valve, deflate fully, lay the board on a flat clean surface with the damaged area facing up. You need a hard flat surface under the repair zone — pressing a patch into a soft surface won’t generate enough contact pressure for a proper bond.
Step 3 — Clean the surface and the patch
Use the foil wipe to clean a 10 cm zone around the damage. Wipe the back of the patch you’ll be using. Let both fully dry — 60–90 seconds in moving air.
Step 4 — Apply cement to both surfaces
Thin even coat on the cleaned hull area, thin even coat on the back of the patch. Wait 5–10 minutes for the cement to become tacky but not wet.
Step 5 — Press the patch in place
Center the patch over the damage and press down firmly with your full body weight for 60 seconds. Use a smooth round object (the back of a spoon works well) to roll outward from the center, pressing out any trapped air bubbles.
Step 6 — Wait 24 hours
This is the step that determines whether the repair lasts 5 years or 5 sessions. Do not re-inflate before 24 hours. Full bond strength comes from giving the polymer chains time to fully reform. Cover the repair area with a clean cloth to keep dust off, and walk away.
Step 7 — Test with low pressure first
After 24 hours, pump the board to 10 PSI and check the patch with the soap-water spray again. No bubbles? Pump to your normal 15 PSI. If everything holds, you’re done — the board is back to full service.
Frequently Asked Questions About SUP Repair Kits
What’s included in a standard inflatable paddle board repair kit?
A complete kit ships with 2–3 PVC patches in matching hull material, a tube of PVC contact cement, a foil-sealed isopropyl-alcohol prep wipe, a valve removal tool, and a brief instruction card. The patches are typically pre-cut as 5–7 cm circles to handle the most common puncture sizes.
Our ABYSUP kit ships with all of the above plus a spare valve core and a spare valve cap, since those are the two non-patch items most likely to need replacing over a multi-year ownership cycle. Everything fits in a small zippered pouch designed to live in the front pocket of the carry bag.
How do you patch a hole in an inflatable paddle board?
Locate the leak with soapy water, deflate fully, clean the area with the prep wipe, apply contact cement to both the hull and the back of the patch, wait 5–10 minutes for the cement to become tacky, press the patch firmly in place for 60 seconds, then leave the repair undisturbed for 24 hours before re-inflating.
The two steps that make the difference between a permanent repair and a failure: thoroughly cleaning the surface before applying cement, and waiting the full 24 hours before re-pressurizing the board. Most failed repairs we see come from skipping one or both of these steps.
Can I use super glue to repair my inflatable SUP?
No. Super glue (cyanoacrylate) creates a brittle hard layer that will crack within a few inflation cycles as the PVC flexes around it. Use only PVC-specific contact cement — the kind that ships in the included repair kit, or commercial-grade equivalents like HH-66 vinyl cement or PolyMarine vinyl adhesive.
The contact cement works by chemically bonding the polymer chains of the patch and the hull into a single continuous material. Super glue and hot glue both fail to do this and will result in a patch that holds pressure briefly before lifting at the edges.
How long does a SUP repair take to cure?
The contact cement is fully tacky and pressed in 5–10 minutes after application, but full cure time before re-inflating is 24 hours minimum, with maximum bond strength at 48–72 hours. This is non-negotiable — the polymer chains need time to fully reform across the patch boundary.
Re-inflating early is the single most common cause of patch failure. If you have an emergency situation and need to use the board sooner, you can pump it to a low pressure (8–10 PSI) at 12 hours and paddle gently in calm water — but expect to redo the repair properly within a week.
Where do I store my SUP repair kit?
In the front zip pocket of your carry bag — permanently. The kit is designed to live there for the life of the board. The patches won’t degrade, the cement is sealed, the wipe is foil-protected, and the valve tool is metal or hard plastic that doesn’t deteriorate.
Don’t store the kit in your car for extended periods in summer heat — the contact cement can degrade if exposed to temperatures over 40°C (104°F) for weeks at a time. The bag’s front pocket inside an air-conditioned home, or the bag stored in a cool garage, is the right environment. Check the cement’s expiry date once a year — most kits are good for 3–5 years from manufacture.
Find a Replacement Kit or Spare Components
Every ABYSUP board ships with a complete repair kit as standard, and the kit lives permanently in the front pocket of your carry bag. There’s nothing extra to buy at unboxing.
If you’ve used your kit, lost a piece, or want to keep a spare for a fleet of boards, our full repair kit range — including individual patches, replacement cement, spare valve cores, and complete kit refills — is available on our SUP repair kit collection. Larger patches and custom-color kits for our touring and yoga ranges are on the same page.
Wholesale and dealer inquiries: our team works directly with rental fleets and retail partners on volume pricing for repair kits and individual components — useful for any operation managing more than ten boards. Reach out through the trade contact form and someone from our team will respond within 48 hours.
Most paddlers will own their board for years and never open this pouch. That’s the goal. But if you do open it one day, you’ll have everything you need to get back on the water by the next morning. Keep it in the outer pocket. Hopefully you’ll never need it. But it’s there.